Mastering Low-Level C Game Development and Networking with Cat
Written by Meowing Cat on 7/20/2024, 10:54:00 PM
Let's make a multiplayer pong game with C with low-level networking and SDL!
Hewwooo, Cat is back with another cat tutorial! 🐱 In this new tutorial, we are going to learn low-level networking and graphics rendering!
Cat is not going to write all the code here in this tutorial, you can get the code from the CatPong GitHub repository. Cat is going to explain important things here in this tutorial; so, you can clone the Git repository and follow along with Cat! 😺
Introduction
 | In this tutorial, we are going to make a multiplayer pong game with C! We will be using low-level networking and SDL for graphics rendering. This tutorial will be useful and good for you if you are interested in learning low-level C programming, networking, graphics rendering and implementing game mechanics. |
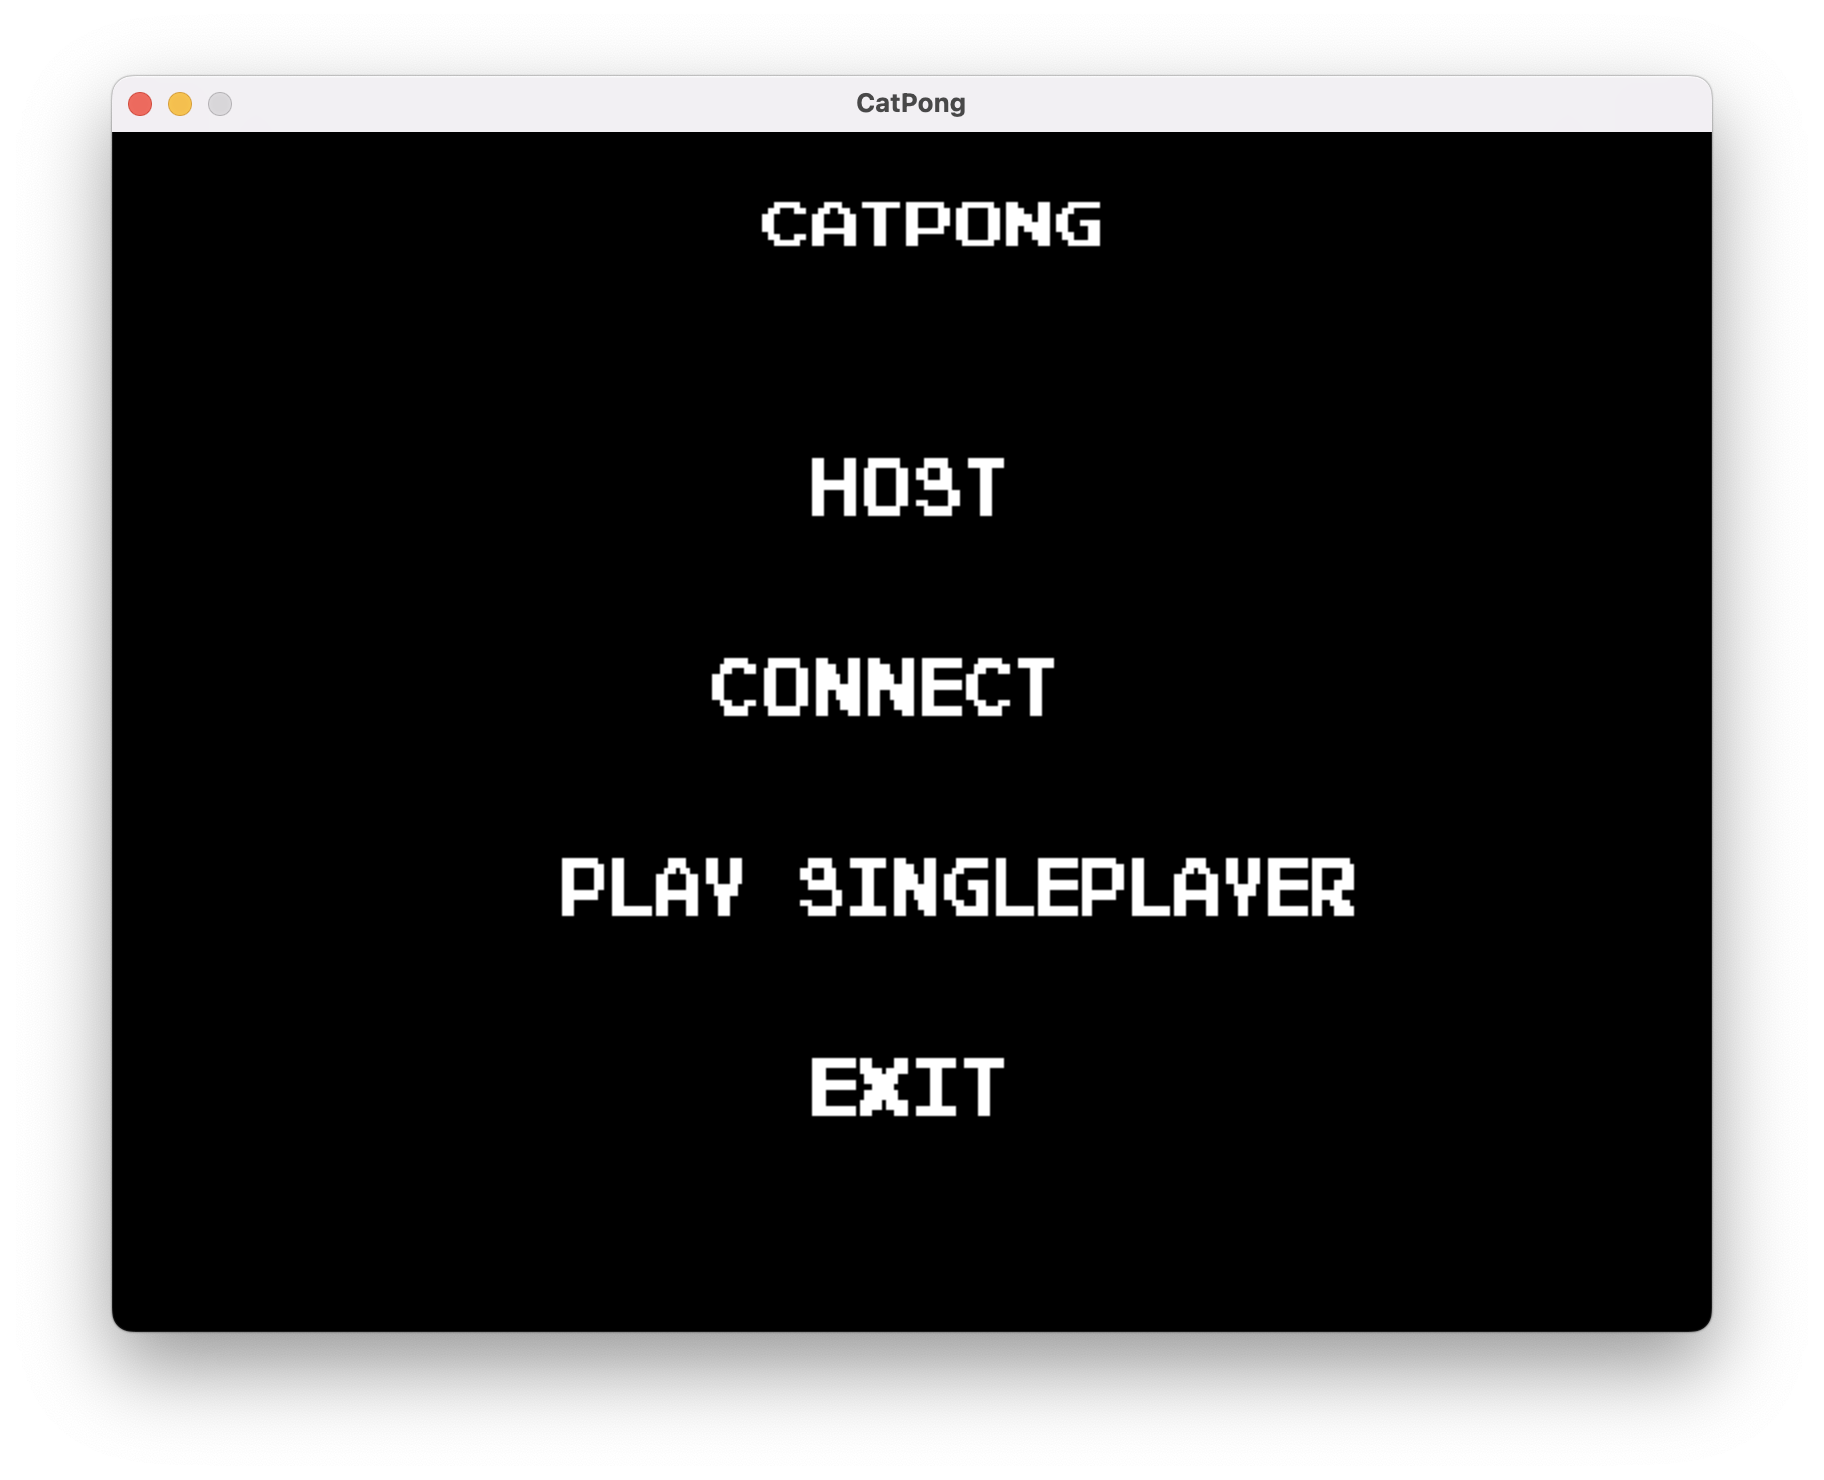
Here, how our game will look like: 😇
🧑🏻💻 Omg.. Cat is so excited to teach you how to make this game! 😺
🐈 Yes, Cat is very excited! 😻
What we are going to study/learn in this tutorial?
- Using GNU Make and CMake to build C/C++ apps
- Making a multiplayer pong game with C
- Using SDL2 for graphics rendering
- Implementing a different scenes and switching betwene them
- Implementing some basic UI elements like buttons
- Implementing a game scene that is usable modularly for singleplayer and multiplayer modes
- Implementing the game mechanics
- Implementing low-level networking for multiplayer
- Dealing with physics frame-rates
- Server-side game mechanics for security
Let’s get started! 🐾
Prerequisites
Before we start, we need something:
- A code editor (Cat strongly recommends you VSCode, because it is the cutest code editor! 😻)
- A C compiler (GCC or CLang)
- CMake (We’ll use damn CMake for this tutorial, cat hates it but it is very popular and it is good Cat to teach you how to use it!)
- SDL2 (We’ll use SDL2 for graphics rendering)
Let’s see how the source files and project directory looks like
├── CMakeLists.txt
├── Makefile
├── assets
│   └── fonts
│       └── PixelEmulator-xq08.ttf
├── include
│   ├── catpong.h
│   ├── input.h
│   ├── node.h
│   ├── pong.h
│   ├── scene.h
│   ├── server.h
│   ├── sugar.h
│   ├── ui.h
│   └── util.h
└── src
    ├── catpong.c
    ├── input.c
    ├── pong.c
    ├── scene_menu.c
    ├── scene_multiplayer.c
    ├── scene_singleplayer.c
    ├── server.c
    ├── ui.c
└── util.c🧑🏻💻 Oh… Cat!!.. What is this? 😾 So many source files and things…
🐈 Yes.. But don’t worry, it is good to learn making seriously large projects in low-level world!
Building the project
There are many build tools out there, but Cat is going to teach you how to use GNU Make and CMake for building the project. Cat hates CMake, but it is very popular and it is good for you to learn it.
Between GNU Make and CMake, you can skip one of them in this tutorial or learn the both!
GNU Make
Making a build with GNU Make is very easy and natural! That’s why Cat loves it! 😻
Especially, if you are making a cloud software with C/C++, you should use GNU Make! But why?
After all, it is just better and less problematic because it is natural! But, why we do never need something other than GNU Make, if we are making a cloud software with C/C++? 🤔
Because, another thing if you are making a cloud service software with C/C++, you definitely must use Docker to make it fully Dockerized! (Read Cat’s Debugging Dockerized C/C++ apps with GDBFrontend article!)
The reason is very simple! If your app is fully Dockerized (which is the best way already far away!), you’ll never need to worry about the build tools! Because, you’ll just run the Docker container, the container is always the same platform to build your app on!
Because the purpose of build tools is to make your app buildable on different platforms! But, if you are using Docker, you are already building your app on the same platform! So, you don’t need to worry about the build tools! 😺
Oki… now let’s get started with pawing our Makefile!
The Makefile
BUILD_DATE = ""$(shell date +'%d.%m.%Y %H:%M')""
BUILD_NUMBER = $(shell printf $$(($$(cat build.txt) + 1)))

VERBOSE = $(shell printf $$((CATPONG_BUILD_VERBOSE)))

ifeq ($(strip $(VERBOSE)), "")
    VERBOSE := 1
endif

REVISION = ""$(shell printf $$(git rev-parse --short HEAD))""

CC = gcc

SDL2_LIB_PATH = /opt/homebrew/Cellar/sdl2/2.30.4/lib
SDL2_TTF_LIB_PATH = /opt/homebrew/Cellar/sdl2_ttf/2.22.0/lib

CFLAGS += -std=c17 		 -O0 		 -ggdb 		 -I. 		 -I./include 		 -I/opt/homebrew/include 		 -L"${SDL2_LIB_PATH}" 		 -lSDL2 		 -L"${SDL2_TTF_LIB_PATH}" 		 -lSDL2_ttf 		 -Wno-unused-command-line-argument 		 -Wunused-variable 		 -Wmissing-field-initializers 		 -Werror=return-type 		 		 -DCATPONG_VERBOSE=$(VERBOSE) 		 -DCATPONG_BUILD=$(BUILD_NUMBER) 		 -DCATPONG_BUILD_DATE=$(BUILD_DATE) 		 -DCATPONG_REVISION=$(REVISION)

ifneq ($(shell uname -s), Darwin)
    CFLAGS +=
endif

LDFLAGS +=

SOURCES = $(shell find . -wholename "./src/*.c")
HEADERS = $(shell find . -wholename "./include/*.h")
EXECUTABLES = build/catpong
OBJECTS = $(addprefix ./build/, $(notdir $(filter-out ./src/catpong.o, $(SOURCES:.c=.o))))
RM = rm -rf

.PHONY: clean all

all: build/catpong

build/catpong: src/catpong.c $(OBJECTS)
	mkdir -p build/

	$(CC) -o $@ $(filter-out %.h, $^) $(CFLAGS) $(LDFLAGS)
	chmod +x build/catpong

	printf $$(($$(cat build.txt) + 1)) > build.txt

	@echo "\033[32mBuild: ${BUILD_NUMBER}\033[0m"
	@echo "\033[32mExecutable: ./build/catpong is built.\033[0m"

build/input.o: src/input.c include/input.h
	mkdir -p build/
	$(CC) -c -o $@ $(filter-out %.h, $^) $(CFLAGS)

build/ui.o: src/ui.c include/ui.h
	mkdir -p build/
	$(CC) -c -o $@ $(filter-out %.h, $^) $(CFLAGS)

build/util.o: src/util.c include/util.h
	mkdir -p build/
	$(CC) -c -o $@ $(filter-out %.h, $^) $(CFLAGS)

build/server.o: src/server.c include/server.h
	mkdir -p build/
	$(CC) -c -o $@ $(filter-out %.h, $^) $(CFLAGS)

build/scene_menu.o: src/scene_menu.c
	mkdir -p build/
	$(CC) -c -o $@ $(filter-out %.h, $^) $(CFLAGS)

build/scene_singleplayer.o: src/scene_singleplayer.c
	mkdir -p build/
	$(CC) -c -o $@ $(filter-out %.h, $^) $(CFLAGS)

build/scene_multiplayer.o: src/scene_multiplayer.c
	mkdir -p build/
	$(CC) -c -o $@ $(filter-out %.h, $^) $(CFLAGS)

build/pong.o: src/pong.c include/pong.h
	mkdir -p build/
	$(CC) -c -o $@ $(filter-out %.h, $^) $(CFLAGS)

clean:
	$(RM) build/
$(RM) $(EXECUTABLES)🧑🏻💻 Oh… Cat!!.. What is this? 😾 So many source files and things…
🐈 Yes.. But don’t worry, it is good to learn making seriously large projects in low-level world! Cat is going to teach you now!
Here, the important things you need to focus on:
The GNU Make Syntax
The overall syntax is understandable, in your Makefile, you define variables and recipes!
Variables in GNU Make
It is very similar to Bash scripting! You define a variable with VARIABLE_NAME = "value" syntax.
Also, as you can see, we can easily use shell commands in the variables! For example, BUILD_DATE = "\"$(shell date +'%d.%m.%Y %H:%M')\"". It is very useful to use shell commands in the variables!
Recipes
This is the key part of the Makefile! You define the recipes to build your project!
A recipe is actually the recipe of a target built file! For example, build/catpong: src/catpong.c $(OBJECTS) is a recipe; then, you define the commands to build the target file! (GNU Make uses tabs (\t) for indentation!)
The all target
The all target is the default target that will be built when you run make command without any target!
The clean target
The clean target is the target that will be used to clean the build files! You can run make clean to clean the build files!
Recipe Dependencies
This is the most important part of the Makefile! You define the dependencies of the target file! For example, build/catpong: src/catpong.c $(OBJECTS); here, the build/catpong target file depends on src/catpong.c and $(OBJECTS)!
GNU Make knows how to build the target file by looking at the dependencies! If the dependencies are not built yet, it builds them first!
Also, GNU Make knows that which source files are changed since the last build! So, it only builds the changed source files as a tree.
Building with GNU Make
To build your app with GNU Make when you have your Makefile, you just run make command in the terminal!
makeThat’s all!
CMake
Well, it is time to pawing the CMakeLists.txt!
The CMakeLists.txt
cmake_minimum_required(VERSION 3.10)

project(CatPong VERSION 1.0 DESCRIPTION "CatPong, Multiplayer Pong")

set(PROJECT_HOMEPAGE_URL https://github.com/rohanrhu/CatPong)
set(PROJECT_DESCRIPTION "Multiplayer Pong for Cat's tutorial")

set(CMAKE_C_STANDARD 17)
set(CMAKE_C_STANDARD_REQUIRED True)
set(CMAKE_EXPORT_COMPILE_COMMANDS True)

add_compile_options(-O0 -ggdb -Wno-unused-command-line-argument -Wunused-variable -Wmissing-field-initializers -Werror=return-type)

include_directories(${PROJECT_SOURCE_DIR}/include)
include_directories(/opt/homebrew/include)

execute_process(COMMAND find /opt/homebrew/Cellar -type d -name lib OUTPUT_VARIABLE SDL2_LIB_PATHS OUTPUT_STRIP_TRAILING_WHITESPACE)
string(REPLACE "\n" ";" SDL2_LIB_PATHS_LIST ${SDL2_LIB_PATHS})

find_library(SDL2_LIBRARY NAMES SDL2 HINTS ${SDL2_LIB_PATHS_LIST})
find_library(SDL2_TTF_LIBRARY NAMES SDL2_ttf HINTS ${SDL2_LIB_PATHS_LIST})

add_definitions(-DCATPONG_VERBOSE=1)

execute_process(COMMAND date "+%d.%m.%Y %H:%M" OUTPUT_VARIABLE BUILD_DATE OUTPUT_STRIP_TRAILING_WHITESPACE)
execute_process(COMMAND git rev-parse --short HEAD OUTPUT_VARIABLE REVISION OUTPUT_STRIP_TRAILING_WHITESPACE)
file(READ "${PROJECT_SOURCE_DIR}/build.txt" BUILD_NUMBER_RAW)
math(EXPR BUILD_NUMBER "${BUILD_NUMBER_RAW}+1")
file(WRITE "${PROJECT_SOURCE_DIR}/build.txt" "${BUILD_NUMBER}")
add_definitions(-DCATPONG_BUILD_DATE="${BUILD_DATE}")
add_definitions(-DCATPONG_BUILD=${BUILD_NUMBER})
add_definitions(-DCATPONG_REVISION="${REVISION}")

file(GLOB SOURCES "${PROJECT_SOURCE_DIR}/src/*.c")

list(FILTER SOURCES EXCLUDE REGEX ".*catpong.c$")

add_executable(catpong ${PROJECT_SOURCE_DIR}/src/catpong.c ${SOURCES})

target_link_libraries(catpong ${SDL2_LIBRARY} ${SDL2_TTF_LIBRARY})

set_target_properties(catpong PROPERTIES RUNTIME_OUTPUT_DIRECTORY ${PROJECT_SOURCE_DIR}/build)

add_custom_target(clean_custom COMMAND ${CMAKE_COMMAND} -E remove_directory ${PROJECT_SOURCE_DIR}/build)

add_custom_command(TARGET catpong POST_BUILD COMMAND ${CMAKE_COMMAND} -E echo "Build: ${BUILD_NUMBER}")
Well! Ugly CMake! 😾 What is going on here?
The purpose of CMake is to generate the build files for the build system you want to use! For example, you can generate the Makefiles with CMake!
Important The key thing here is that the CMake generates
Makefiles that are compatible with your platform (OS, installed compilers, libraries and configurations of your platform…).
CMake can create build scripts for almost all build tools like GNU Make, Ninja and Visual Studio!
Building with CMake
CMake generates build scripts for build tools like GNU Make or Ninja. What you do to build your app with CMake is something like this:
mkdir build, Create abuild/directory; CMake will generate build files from the parent directory (project directory) into this build directory.cd build, Enter the build directory.cmake .., Generate the build files with CMake.cmake --build ., Build the app
To clean your build completely, you can just do:
rm -rf build/*Let’s start pawing code!
Now, we are going to start pawing the code! 🐾
At this point, I’m assuming you clond the CatPong Repository and played it! 😺 If you haven’t, you should do it now! Also, take a quick look at the project files and the code.
We are making a multiplayer and singleplayer pong game so, we’ll have many things to deal with. Some topics:
- Using SDL2 for graphics rendering
- A game menu scene
- Some basic UI elements like buttons (We are using only SDL2, so we need to implement them ourselves!)
- A game scene that is usable modularly for singleplayer and multiplayer modes
- Low-level networking for multiplayer
- Implementing the game mechanics
🧑🏻💻 Damn… Cat!!.. There are so many difficult things to deal with 🙀
🐈 Yes, but don’t worry! Cat is here to help you! 😺
Using SDL2 for graphics rendering
We need the SDL2 libraries. (SDL2 main library and SDL2 TTF library for rendering texts with our font file.)
You can install the SDL2 libraries with your package manager or you can download the source code and compile it yourself.
If you are using macOS, you can install the SDL2 libraries with Homebrew:
brew install sdl2 sdl2_ttfThen, CMake must be able to find the installed SDL2 libs.
If you are using Debian or a Debian based distro, you can install the SDL2 libraries with your package manager:
sudo apt-get install libsdl2-dev libsdl2-ttf-devThen, CMake must be able to find the installed SDL2 libs.
If you are using Windows, you can download the SDL2 libraries from the SDL2 website.
A game menu scene
We need a game menu scene to start the game, select the game mode and exit the game.
We did it in scene_menu.c. Let’s see:
void catpong_scene_menu(catpong_window_t* window) {
    catpong_label_t* title_label = catpong_label_new(window, CATPONG_UI_FONT_PATH, 32, "CatPong", (SDL_Color) {255, 255, 255, 255});
    catpong_label_set_position(title_label, window->width / 2 - 75, 25);

    catpong_button_t* host_button = catpong_button_new(window, CATPONG_UI_FONT_PATH, 16, "Host", (SDL_Color) {255, 255, 255, 255}, (SDL_Color) {0, 0, 0, 255});
    catpong_button_set_position(host_button, window->width / 2 - 50, 150);
    catpong_button_set_size(host_button, 100, 50);

    catpong_button_t* connect_button = catpong_button_new(window, CATPONG_UI_FONT_PATH, 16, "Connect", (SDL_Color) {255, 255, 255, 255}, (SDL_Color) {0, 0, 0, 255});
    catpong_button_set_position(connect_button, window->width / 2 - 100, 250);
    catpong_button_set_size(connect_button, 175, 50);

    catpong_button_t* play_singleplayer_button = catpong_button_new(window, CATPONG_UI_FONT_PATH, 16, "Play Singleplayer", (SDL_Color) {255, 255, 255, 255}, (SDL_Color) {0, 0, 0, 255});
    catpong_button_set_position(play_singleplayer_button, window->width / 2 - 175, 350);
    catpong_button_set_size(play_singleplayer_button, 400, 50);

    catpong_button_t* exit_button = catpong_button_new(window, CATPONG_UI_FONT_PATH, 16, "Exit", (SDL_Color) {255, 255, 255, 255}, (SDL_Color) {0, 0, 0, 255});
    catpong_button_set_position(exit_button, window->width / 2 - 50, 450);
    catpong_button_set_size(exit_button, 100, 50);

    SDL_Event event;

    while (window->is_running) {
        while (SDL_PollEvent(&event)) {
            if (event.type == SDL_QUIT) {
                window->is_running = false;
            }
        }

        catpong_input_mouse_state_t mouse_state;
        catpong_input_get_mouse_state(&mouse_state);

        if (catpong_button_is_pressed_once(exit_button)) {
            window->is_running = false;
        }

        if (catpong_button_is_pressed_once(host_button)) {
            scene = CATPONG_SCENE_MULTIPLAYER;
            catpong_scene_multiplayer(window, true);
        }

        if (catpong_button_is_pressed_once(connect_button)) {
            scene = CATPONG_SCENE_MULTIPLAYER;
            catpong_scene_multiplayer(window, false);
        }

        if (catpong_button_is_pressed_once(play_singleplayer_button)) {
            scene = CATPONG_SCENE_SINGLEPLAYER;
            catpong_scene_singleplayer(window);
        }

        catpong_window_clear(window);

        catpong_label_update(title_label);

        catpong_button_use_mouse_state(host_button, &mouse_state);
        catpong_button_update(host_button);

        catpong_button_use_mouse_state(connect_button, &mouse_state);
        catpong_button_update(connect_button);

        catpong_button_use_mouse_state(play_singleplayer_button, &mouse_state);
        catpong_button_update(play_singleplayer_button);

        catpong_button_use_mouse_state(exit_button, &mouse_state);
        catpong_button_update(exit_button);

        catpong_window_update(window);

        SDL_Delay(16);
    }

    catpong_label_free(title_label);
    catpong_button_free(play_singleplayer_button);
    catpong_button_free(exit_button);
}
As you can see, there are some UI elements that Cat implemented because SDL2 is a low-level graphics library and it doesn’t have built-in UI elements.
What about the loop?
It is the rendering loop. In the loop, we are handling the events, updating the UI elements and rendering them.
Whether we use a low-level way like this or a game engine like Unity, Unreal Engine or Godot, there is always a loop like this in the game. This loop is called the game loop or rendering loop. High-level game engines like Unity, Unreal Engine or Godot hide this loop from you, but they give you an update method that you can write/override and they call this method in their loop.
Some basic UI elements like buttons
Our game has button element right? And it is hoverable! Because, I’ve made it hoverable! 😺 When you put your mouse over the button, it changes its style!
We did it in ui.c. But it’s too much code for here! You can check the code in the repository!
But, let’s see the ui.h header file:
#define CATPONG_UI_FONT_PATH "assets/fonts/PixelEmulator-xq08.ttf"

typedef struct catpong_window catpong_window_t;
struct catpong_window {
    catpong_node_t node;
    int width;
    int height;
    SDL_Window *sdl_window;
    SDL_Renderer *sdl_renderer;
    SDL_Color sdl_background_color;
    bool is_running;
};

catpong_window_t *catpong_window_new(const char *title, int x, int y, int width, int height, Uint32 flags);
void catpong_window_free(catpong_window_t *window);
void catpong_window_clear(catpong_window_t *window);
void catpong_window_present(catpong_window_t *window);
void catpong_window_update(catpong_window_t *window);

typedef struct catpong_label catpong_label_t;
struct catpong_label {
    catpong_node_t node;
    catpong_window_t* window;
    char* text;
    SDL_Renderer *sdl_renderer;
    TTF_Font *tff_font;
    SDL_Color sdl_color;
    SDL_Surface *sdl_surface;
    SDL_Texture *sdl_texture;
    SDL_Rect sdl_rect;
    int x;
    int y;
};

catpong_label_t *catpong_label_new(catpong_window_t* window, const char *font_path, int font_size, const char *text, SDL_Color color);
void catpong_label_free(catpong_label_t *label);
void catpong_label_render(catpong_label_t *label, int x, int y);
void catpong_label_update(catpong_label_t *label);
void catpong_label_set_position(catpong_label_t *label, int x, int y);
void catpong_label_set_text(catpong_label_t *label, const char *text);

typedef struct catpong_button catpong_button_t;
struct catpong_button {
    catpong_node_t node;
    catpong_window_t* window;
    char* text;
    SDL_Renderer *sdl_renderer;
    TTF_Font *tff_font;
    SDL_Color sdl_color;
    SDL_Color sdl_background_color;
    SDL_Surface *sdl_surface;
    SDL_Texture *sdl_texture;
    SDL_Rect sdl_rect;
    int x;
    int y;
    int width;
    int height;
    catpong_input_mouse_state_t mouse_state;
    bool is_hovered;
    bool is_hovered_handled;
    bool is_pressed;
    bool is_pressed_handled;
};

catpong_button_t *catpong_button_new(catpong_window_t* window, const char *font_path, int font_size, const char *text, SDL_Color color, SDL_Color background_color);
void catpong_button_free(catpong_button_t *button);
void catpong_button_render(catpong_button_t *button);
void catpong_button_update(catpong_button_t *button);
void catpong_button_set_position(catpong_button_t *button, int x, int y);
void catpong_button_set_size(catpong_button_t *button, int width, int height);
void catpong_button_set_text(catpong_button_t *button, const char *text);
void catpong_button_update_hovered(catpong_button_t *button, int x, int y);
void catpong_button_update_pressed(catpong_button_t *button, bool is_pressed);
bool catpong_button_is_hovered_once(catpong_button_t *button);
bool catpong_button_is_pressed_once(catpong_button_t *button);
void catpong_button_use_mouse_state(catpong_button_t *button, catpong_input_mouse_state_t *mouse_state);
Here, we have the catpong_window_t struct for the window, catpong_label_t struct for the label and catpong_button_t struct for the button.
We are using our own simple UI system for the game.
But, how it works exactly? In scene_menu.c file, you can see how we’re using our own UI system; some key things are:
- Creating the window with
catpong_window_new()function - Creating the label with
catpong_label_new()function - Creating the button with
catpong_button_new()function
Let’s dive into the usage of our button element!
This is the definition:
catpong_button_t* host_button = catpong_button_new(window, CATPONG_UI_FONT_PATH, 16, "Host", (SDL_Color) {255, 255, 255, 255}, (SDL_Color) {0, 0, 0, 255});
catpong_button_set_position(host_button, window->width / 2 - 50, 150);
catpong_button_set_size(host_button, 100, 50);
…, this is not enough! Because, we are in the low-level programming universe right now; we need to call the catpong_button_update() function in our rendering loop.
catpong_button_use_mouse_state(host_button, &mouse_state);
catpong_button_update(host_button);
And, we need to handle the button press event in the loop:
if (catpong_button_is_pressed_once(host_button)) {
    scene = CATPONG_SCENE_MULTIPLAYER;
    catpong_scene_multiplayer(window, true);
}
We have
catpong_button_is_pressed_once()to handle only down click event! Because, SDL2 only gives us the state of mouse buttons (down (clicked) or up)!
Let’s dive into the catpong_button_is_pressed_once() function:
bool catpong_button_is_pressed_once(catpong_button_t *button) {
    if (button->is_pressed && !button->is_pressed_handled) {
        button->is_pressed_handled = true;
        return true;
    }

    return false;
}
I think, the code is pretty clear and you understood it well.
In low-level universe, we always have to deal with this basic stuff from scratch.
Here, you can assume
catpong_button_is_pressed_once(host_button)likehost_button->is_pressed_once().
Just like C++ and classes! Having this kind of structed namespaces (
[APPNAME]_[MODULE]_method_name(object)structure likeobject->methodName()is useful.)
Implementing the game scene and mechanics
At this point, please look at the scene_singpleplayer.c and pong.c source files.
The pong.c is a module that we are using both from scene_singleplayer.c and scene_multiplayer.c.
Singplayer Scene
It is simple because we are using the catpong_pong_... (pong.c) module for this.
void catpong_scene_singleplayer(catpong_window_t* window) {
    catpong_pong_t* pong = catpong_pong_new(window, CATPONG_GAME_MODE_SINGLEPLAYER);
    catpong_pong_init(pong);

    pong->is_running = true;

    while (pong->is_running) {
        catpong_input_mouse_state_t mouse_state;
        catpong_input_get_mouse_state(&mouse_state);

        if (mouse_state.x < window->width / 2) {
            catpong_input_get_mouse_state(&pong->p1_mouse_state);
        } else {
            catpong_input_get_mouse_state(&pong->p2_mouse_state);
        }

        catpong_pong_update(pong);
    }
}
Here, the pong module has catpong_pong_update() (the rendering loop function, we are calling it in our singleplayer and multiplayer game loops).
This is the catpong_input_get_mouse_state() function:
void catpong_input_get_mouse_state(catpong_input_mouse_state_t *state) {
    int x;
    int y;

    uint32_t buttons = SDL_GetMouseState(&x, &y);
    state->x = x;
    state->y = y;
    state->left_button = buttons & SDL_BUTTON(SDL_BUTTON_LEFT);
    state->right_button = buttons & SDL_BUTTON(SDL_BUTTON_RIGHT);
}
In this part:
if (mouse_state.x < window->width / 2) {
    catpong_input_get_mouse_state(&pong->p1_mouse_state);
} else {
    catpong_input_get_mouse_state(&pong->p2_mouse_state);
}
…, we are considering the mouse movement/position as left player and right player’s mouse movements; if the mouse cursor is placed in left half of the game window, it is considered as left player’s action and the opposite for the right half.
Let’s dive into the game mechanics
At this point, please look at the pong.c/pong.h source files.
We have some important things that we are doing:
catpong_pong_init(pong)function (imagine likepong->init()!) to initialize the game statecatpong_pong_update(pong)to call in the game loop for every frame- Fixing the game frame speed with
deltatime! (Don’t worry Cat’ll explain it!) - Implementing the game mechanics
Moving the player paddles
pong->paddle_left.y = pong->p1_mouse_state.y - pong->paddle_left.h / 2;
pong->paddle_right.y = pong->p2_mouse_state.y - pong->paddle_right.h / 2;
Here, we are moving the player paddless in catpong_pong_update(pong) function.
Here is the important part of the code:
} else if ((pong->game_state == CATPONG_PONG_GAME_STATE_PLAYING) && (IS(pong->mode, CATPONG_GAME_MODE_SERVER) || IS(pong->mode, CATPONG_GAME_MODE_SINGLEPLAYER))) {
    bool is_left_collided = SDL_HasIntersection(&pong->ball, &pong->paddle_left);
    bool is_right_collided = SDL_HasIntersection(&pong->ball, &pong->paddle_right);

    if (is_left_collided) {
        pong->ball_angle = catpong_util_random_angle_righthalf();
        pong->ball_x = pong->paddle_left.x + pong->paddle_left.w + 2;
    } else if (is_right_collided) {
        pong->ball_angle = catpong_util_random_angle_lefthalf();
        pong->ball_x = (pong->paddle_right.x - pong->ball.w) - 2;
    }

    bool is_top_collided = (pong->ball_y - pong->ball.h/2) <= 0;
    bool is_bottom_collided = (pong->ball_y + pong->ball.h/2) >= (pong->window->height - pong->ball.h);

    if (is_top_collided) {
        pong->ball_angle = catpong_util_random_angle_bottomhalf();
    } else if (is_bottom_collided) {
        pong->ball_angle = catpong_util_random_angle_tophalf();
    }

    pong->paddle_left.y = pong->p1_mouse_state.y - pong->paddle_left.h / 2;
    pong->paddle_right.y = pong->p2_mouse_state.y - pong->paddle_right.h / 2;

    double vx = cos(pong->ball_angle);
    double vy = sin(pong->ball_angle);
    double magnitude = sqrt(vx * vx + vy * vy);

    if (magnitude != 0) {
        vx /= magnitude;
        vy /= magnitude;
    }

    pong->ball_x += vx * pong->ball_velocity * delta;
    pong->ball_y += vy * pong->ball_velocity * delta;

    if (pong->ball_x <= 0) {
        printf("Player Two wins!\n");
        pong->is_running = false;
    } else if (pong->ball_x >= pong->window->width) {
        printf("Player One wins!\n");
        pong->is_running = false;
    }
}

pong->ball.x = pong->ball_x;
pong->ball.y = pong->ball_y;

// ...
This line is important:
} else if ((pong->game_state == CATPONG_PONG_GAME_STATE_PLAYING) && (IS(pong->mode, CATPONG_GAME_MODE_SERVER) || IS(pong->mode, CATPONG_GAME_MODE_SINGLEPLAYER))) {We are checking if it is singleplayer mode or multiplayer but it is the server side!
- If it is singleplayer, we are just doing what to do.
- If it is multiplayer mode, we are doing the game mechanics things for only the server peer!
Important This is important for multiplayer games’ security! Because this way is unhackable!
The game mechanics is being calculated in only the server side; the client(s) are sending their inputs (like mouse movements) to the server and server plays the game on its own side.
Then, the server sends (broadcasts) all the current state to all client(s).
In this way/mechanism, your game will be *unhackable because all the game mechanics and calculations are calculated/processed in the server and clients are only able to send their inputs.
Fixing the game speed universally!
This is an important thing because, imagine, your game always will have a variable frame rate. This means that your ball will be moving with different speeds! 🙀
Terrible… Right? But don’t worry, Cat’s about to teach you how to deal with this!
In, pong.c we are doing this:
void catpong_pong_update(catpong_pong_t* pong) {
    int elapsed = SDL_GetTicks() - pong->t0;
    float delta = elapsed / 16.0;

    // the stuff we are doing here

    if (elapsed >= 16) {
        pong->t0 = SDL_GetTicks();
    }
}
Here, we are calculating the elapsed time since the rendering last frame and calculating the delta ratio based on a fixed physics frame-rate.
The 16 value is 16 milliseconds here, that means we are fixing our physics frame-rate to 60 FPS for physics calculations;
because 1000ms / 60ms = 16ms, this means having the frame rendered for each 16ms is 60 frames per a second (1s = 1000ms).
This is a very important thing in game development! Because, you need to fix your physics frame-rate to make your game consistent, playable and fair!
Otherwise, everyone and even same person on same computer will have varying frame rates depending on many many conditions.
We’ll always have variable frame rates because of the GPU, CPU, other apps running in the background, the operating system and many other things; but, movements will always be consistent and same for all frame rates.
The delta is the ratio of the current elapsed milliseconds since the last frame.
Let me explain:
- We rendered the Frame 1
- Now, we are about to render Frame 2 and exact 16ms elapsed
- The
deltaisdelta = 16 / 16 = 1in this case. That means we’ll do:
pong->ball_x += vx * pong->ball_velocity * delta; // Delta is 1 and not affecting any movement, because we fixed the physics frame-rate to 60 FPS (16ms for each frame)
pong->ball_y += vy * pong->ball_velocity * delta; // Delta is 1 and not affecting any movement, because we fixed the physics frame-rate to 60 FPS (16ms for each frame)
Another scenario:
- We rendered the Frame 1
- Now, we are about to render Frame 2 and 32ms elapsed!
- The
deltaisdelta = 32 / 16 = 2in this case and that means:
For some reasons (slow GPU or CPU or other apps are running in background and we are having slow frame rates…), the game is running with 30 FPS and our ball must not move slower psyically!
Omg… 🙀 30 FPS and 60 FPS would mean our ball to move with different speeds physically!
pong->ball_x += vx * pong->ball_velocity * delta; // delta is 2 and it will double the speed to COMPENSATE the slowness of our frame-rate!
pong->ball_y += vy * pong->ball_velocity * delta; // delta is 2 and it will double the speed to COMPENSATE the slowness of our frame-rate!
Here, the delta = 2 will double the movement speed and COMPENSATE the lack of speed that is because of the case our game is running with 30 FPS instead of 60 FPS.
30 FPS and 60 FPS example is very simple to see the key point here, if the game is fixed to 60 FPS for physics frame-rate, 30 FPS will mean we’ll increase the phyiscs speeds to the double of them.
Now we are ready for the networking part!
Networking
Multiplayer networking is always a challenging thing but here it is more difficult because we are implementing low-level networking for a game.
Server Module
Let’s quickly glance at the server.h:
typedef enum {
    CATPONG_SERVER_PACKET_JOIN = 1,
    CATPONG_SERVER_PACKET_DISCONNECTED,
    CATPONG_SERVER_PACKET_STARTING,
    CATPONG_SERVER_PACKET_START,
    CATPONG_SERVER_PACKET_END,
    CATPONG_SERVER_PACKET_MOVE,
    CATPONG_SERVER_PACKET_STATE
} catpong_server_packet_opcode_t;

typedef struct catpong_server_packet_header catpong_server_packet_header_t;
typedef struct catpong_server_packet_move catpong_server_packet_move_t;
typedef struct catpong_server_packet_state catpong_server_packet_state_t;
typedef struct catpong_server_peer catpong_server_peer_t;
typedef struct catpong_server catpong_server_t;

struct catpong_server_packet_header {
    uint8_t opcode;
};

struct catpong_server_packet_move {
    uint32_t y;
};

struct catpong_server_packet_state {
    uint32_t left_paddle;
    uint32_t right_paddle;
    uint32_t ball_x;
    uint32_t ball_y;
};

struct catpong_server_peer {
    catpong_server_t* server;
    struct sockaddr_in address;
    bool is_running;
    int socket;
    pthread_t thread;
    pthread_mutex_t mutex;
    void* owner;
    void (*on_join)(catpong_server_peer_t* peer);
    void (*on_disconnected)(catpong_server_peer_t* peer);
    void (*on_starting)(catpong_server_peer_t* peer);
    void (*on_start)(catpong_server_peer_t* peer);
    void (*on_end)(catpong_server_peer_t* peer);
    void (*on_move)(catpong_server_peer_t* peer, catpong_server_packet_move_t move);
    void (*on_state)(catpong_server_peer_t* peer, catpong_server_packet_state_t state);
};

struct catpong_server {
    catpong_server_peer_t* peer;
    catpong_server_peer_t* opponent_peer;
    bool is_running;
    struct sockaddr_in address;
    int socket;
    pthread_t thread;
    pthread_mutex_t mutex;
};

catpong_server_t* catpong_server_new(const char* address, int port);
void catpong_server_free(catpong_server_t* server);
void catpong_server_listen(catpong_server_t* server);
void catpong_server_stop(catpong_server_t* server);

catpong_server_peer_t* catpong_server_peer_new(catpong_server_t* server, struct sockaddr_in address, int socket);
void catpong_server_peer_free(catpong_server_peer_t* peer);
void catpong_server_peer_send(catpong_server_peer_t* peer, const unsigned char* message, size_t length);

catpong_server_peer_t* catpong_server_connect(const char* address, int port);
void catpong_server_disconnect(catpong_server_peer_t* peer);

void catpong_server_send(catpong_server_peer_t* peer, catpong_server_packet_opcode_t opcode, const void* data, size_t length);
…, and review the sever.c too. We are using this server module from the scene_multiplayer.c.
Multiplayer Scene
Here is the scene_multiplayer.c:
static void on_join(catpong_server_peer_t* peer) {
    catpong_pong_t* pong = peer->owner;

    if (pong->game_state == CATPONG_PONG_GAME_STATE_W4P) {
        pong->game_state = CATPONG_PONG_GAME_STATE_STARTING;

        catpong_server_send(peer, CATPONG_SERVER_PACKET_STARTING, NULL, 0);
    }
}

static void on_disconnected(catpong_server_peer_t* peer) {
    const catpong_pong_t* pong __attribute__((unused)) = peer->owner;
}

static void on_move(catpong_server_peer_t* peer, catpong_server_packet_move_t move) {
    catpong_pong_t* pong = peer->owner;

    pong->p2_mouse_state.y = move.y;
}

static void on_starting(catpong_server_peer_t* peer __attribute__((unused))) {
    catpong_pong_t* pong = peer->owner;

    printf("Game is starting.\n");

    pong->game_state = CATPONG_PONG_GAME_STATE_STARTING;
}

static void on_start(catpong_server_peer_t* peer __attribute__((unused))) {
    catpong_pong_t* pong = peer->owner;

    printf("Game started.\n");

    pong->game_state = CATPONG_PONG_GAME_STATE_PLAYING;
}

static void on_end(catpong_server_peer_t* peer __attribute__((unused))) {
    const catpong_pong_t* pong __attribute__((unused)) = peer->owner;

    printf("Game ended.\n");
}

static void on_state(catpong_server_peer_t* peer, catpong_server_packet_state_t state) {
    catpong_pong_t* pong = peer->owner;

    pong->paddle_left.y = state.left_paddle;
    pong->paddle_right.y = state.right_paddle;

    pong->ball_x = state.ball_x;
    pong->ball_y = state.ball_y;
}

bool catpong_scene_multiplayer(catpong_window_t* window, bool is_host) {
    catpong_pong_t* pong = catpong_pong_new(window, CATPONG_GAME_MODE_MULTIPLAYER | (is_host ? CATPONG_GAME_MODE_SERVER: 0));

    catpong_server_t* server = NULL;
    catpong_server_peer_t* peer = NULL;

    if (is_host) {
        server = catpong_server_new("127.0.0.1", 8090);
        peer = server->peer;

        if (!server) {
            printf("Failed to create the server.\n");
            return false;
        }

        peer->owner = pong;

        catpong_server_listen(server);
    } else {
        peer = catpong_server_connect("127.0.0.1", 8090);

        if (!peer) {
            printf("Failed to connect to the server.\n");
            return false;
        }

        peer->owner = pong;
    }

    peer->on_join = &on_join;
    peer->on_disconnected = &on_disconnected;
    peer->on_move = &on_move;
    peer->on_starting = &on_starting;
    peer->on_start = &on_start;
    peer->on_end = &on_end;
    peer->on_state = &on_state;

    catpong_pong_init(pong);

    pong->is_running = true;

    if (is_host) {
        pong->game_state = CATPONG_PONG_GAME_STATE_W4P;
    } else {
        pong->game_state = CATPONG_PONG_GAME_STATE_JOINING;
        catpong_server_send(peer, CATPONG_SERVER_PACKET_JOIN, NULL, 0);
    }

    bool is_started = false;

    while (pong->is_running) {
        pthread_mutex_lock(&peer->mutex);

        if (is_host) {
            catpong_input_get_mouse_state(&pong->p1_mouse_state);

            if ((pong->game_state == CATPONG_PONG_GAME_STATE_PLAYING) && !is_started) {
                is_started = true;
                catpong_server_send(peer->server->opponent_peer, CATPONG_SERVER_PACKET_START, NULL, 0);
            } else if  (pong->game_state == CATPONG_PONG_GAME_STATE_PLAYING) {
                catpong_server_packet_state_t state = {
                    .left_paddle = pong->paddle_left.y,
                    .right_paddle = pong->paddle_right.y,
                    .ball_x = pong->ball_x,
                    .ball_y = pong->ball_y
                };

                catpong_server_send(peer->server->opponent_peer, CATPONG_SERVER_PACKET_STATE, &state, sizeof(catpong_server_packet_state_t));
            }
        } else {
            catpong_input_mouse_state_t mouse_state;
            catpong_input_get_mouse_state(&mouse_state);

            catpong_server_packet_move_t move = {.y = mouse_state.y};
            catpong_server_send(peer, CATPONG_SERVER_PACKET_MOVE, &move, sizeof(move));
        }

        catpong_pong_update(pong);

        pthread_mutex_unlock(&peer->mutex);

        SDL_Delay(16);
    }

    return true;
}
Here, again, we are using the the pong module (pong.c) like the singleplayer mode but different and more complicated.
We have is_host to behave different for server peer and client peer!
Don’t forget that the game mechanics, all physics are being calculated on the server peer’s side.
Important We are using
peer->mutexto synchronize rendering thread and networking thread!
Here is what we are doing:
- If the peer is server peer (or might be called host peer), host the game:
- Listen for client peer’s inputs (mouse movements)
- Apply remotely-received client_peer inputs into the game mechanics
- Send the game STATE (paddle positions and ball position and game events like (starting, started, ended)) to the client-peer
- If the peer is client-peer:
- Send the JOIN packet
- Send the inputs (mouse movements)
- Receive and apply the game STATE packat
Simple… right?
🧑🏻💻 Oh, Cat… What is simple here? It is complicated, I’m lost!!!
🐈 Don’t be lost! Please, look at the code, run it, play with it and read the tutorial simultaneously! You’ll understand it eventually!
Implementing Networking Things
Review the server.c/server.h and let’s higlight the important key things.
You’ll see server and peer types:
catpong_server_tcatpong_server_peer_t
And let’s look at the definitions of them:
struct catpong_server_peer {
    catpong_server_t* server;
    struct sockaddr_in address;
    bool is_running;
    int socket;
    pthread_t thread;
    pthread_mutex_t mutex;
    void* owner;
    void (*on_join)(catpong_server_peer_t* peer);
    void (*on_disconnected)(catpong_server_peer_t* peer);
    void (*on_starting)(catpong_server_peer_t* peer);
    void (*on_start)(catpong_server_peer_t* peer);
    void (*on_end)(catpong_server_peer_t* peer);
    void (*on_move)(catpong_server_peer_t* peer, catpong_server_packet_move_t move);
    void (*on_state)(catpong_server_peer_t* peer, catpong_server_packet_state_t state);
};

struct catpong_server {
    catpong_server_peer_t* peer;
    catpong_server_peer_t* opponent_peer;
    bool is_running;
    struct sockaddr_in address;
    int socket;
    pthread_t thread;
    pthread_mutex_t mutex;
};
Server type also has a peer member right? Because the peer type is an abstracted peer type for server and client sides!
Network Packets
We have packets:
typedef enum {
    CATPONG_SERVER_PACKET_JOIN = 1,
    CATPONG_SERVER_PACKET_DISCONNECTED,
    CATPONG_SERVER_PACKET_STARTING,
    CATPONG_SERVER_PACKET_START,
    CATPONG_SERVER_PACKET_END,
    CATPONG_SERVER_PACKET_MOVE,
    CATPONG_SERVER_PACKET_STATE
} catpong_server_packet_opcode_t;
and *a packet structure**!
The packet structure is something like this:
| Data | Length |
| OPCODE | int, 4-bytes |
| Packet Data | optional, depending on the OPCODE |
Let Cat explain better, let’s look at here:
static void peer_thread_f(catpong_server_peer_t* peer) {
    uint32_t opcode = 0;

    RECEIVE:
    recv(peer->socket, &opcode, sizeof(opcode), MSG_WAITALL);

    if (opcode == CATPONG_SERVER_PACKET_STARTING) {
        pthread_mutex_lock(&peer->mutex);
        peer->on_starting(peer);
        pthread_mutex_unlock(&peer->mutex);
    } else if (opcode == CATPONG_SERVER_PACKET_START) {
        pthread_mutex_lock(&peer->mutex);
        peer->on_start(peer);
        pthread_mutex_unlock(&peer->mutex);
    } else if (opcode == CATPONG_SERVER_PACKET_END) {
        pthread_mutex_lock(&peer->mutex);
        peer->on_end(peer);
        pthread_mutex_unlock(&peer->mutex);
    } else if (opcode == CATPONG_SERVER_PACKET_STATE) {
        catpong_server_packet_state_t state;
        recv(peer->socket, &state, sizeof(catpong_server_packet_state_t), MSG_WAITALL);

        pthread_mutex_lock(&peer->mutex);
        peer->on_state(peer, state);
        pthread_mutex_unlock(&peer->mutex);
    }

    if (peer->is_running) {
        goto RECEIVE;
    }
}
Here, we are receiving the packets and calling the callbacks for the received packets.
For other packet types (OPCODEs) we don’t have an additional data but the CATPONG_SERVER_PACKET_STATE opcode has additional data…
We are receiving it like this:
if (opcode == CATPONG_SERVER_PACKET_STATE) {
    catpong_server_packet_state_t state;
    recv(peer->socket, &state, sizeof(catpong_server_packet_state_t), MSG_WAITALL);

    pthread_mutex_lock(&peer->mutex);
    peer->on_state(peer, state);
    pthread_mutex_unlock(&peer->mutex);
}
In line of recv(peer->socket, &state, sizeof(catpong_server_packet_state_t), MSG_WAITALL);, we are receiving bytes from the network socket in size of sizeof(catpong_server_packet_state_t) and buffering them
into state variable. It is catpong_server_packet_state_t state; is a variable on stack; recv()’s second parameter takes a void pointer (void *) to buffer N. bytes (specified size of how many bytes will be read in 3. parameter).
This is a very efficient and well-structured, stronlgy-typed way to implement low-level networking protocols. Look at the code and play with it, you’ll understand eventually. 😇 🐾
Conclusion
Omg… 😺 We did it! We implemented a simple multiplayer game with low-level networking and game mechanics! Everything is stoopidly low-level here! 🙀
What did we learn?
- We learned how to implement a simple multiplayer game with low-level networking
- We learned how to implement game mechanics
- We learned how to implement a simple UI system
- We learned how to implement a simple game loop
- We learned dealing with physics frame-rates
- We learned how to use GNU Make and CMake for building or C/C++ apps
Ofc, you need a lot of more practices to mastering low-level programming, game development and network development; but, I hope this tutorial was a good start. 😇 🐾
Thanks for reading. Cat is always here to help you. If you have questions, recommendations or requests, feel free to add a comment below or reach me on GDBFrontend Discord.
See you in the next Cat tutorial!
Happy code pawing… 🐈 🐾